

Table of Contents
- What You'll Need Before You Start
- Step 1: Position the Brace for a Proper Back Brace Fit
- Step 2: Adjust Tightness and Pressure Levels
- Step 3: Position the Wings or Side Panels
- Signs a Back Brace Is Too Tight (and What to Do)
- How Long to Wear a Back Brace: Ideal Wear Schedule
- Wearing a Back Brace Over or Under Clothing
- Troubleshooting Common Discomforts and Fitting Differences by Brace Type
- Frequently Asked Questions
Last Updated: September 17, 2026
What You'll Need Before You Start
Knowing how to properly fit a back brace comes down to preparation. Gather what you need first so the fitting takes minutes, not a frustrating back-and-forth.
Here's what to have on hand:
- Your brace and its user manual, since adjustment mechanisms differ between designs
- A mirror, ideally a full-length one, so you can check midline alignment from the front and side
- A fitted undershirt or thin base layer to protect skin integrity during wear
- A chair if you find sitting makes the process easier to manage
Step 1: Position the Brace for a Proper Back Brace Fit
Knowing how to properly fit a back brace starts with posture, not straps. Stand tall with feet hip-width apart, shoulders relaxed, weight evenly distributed. This neutral spine position is what the brace will support, so be in it before the brace goes on.
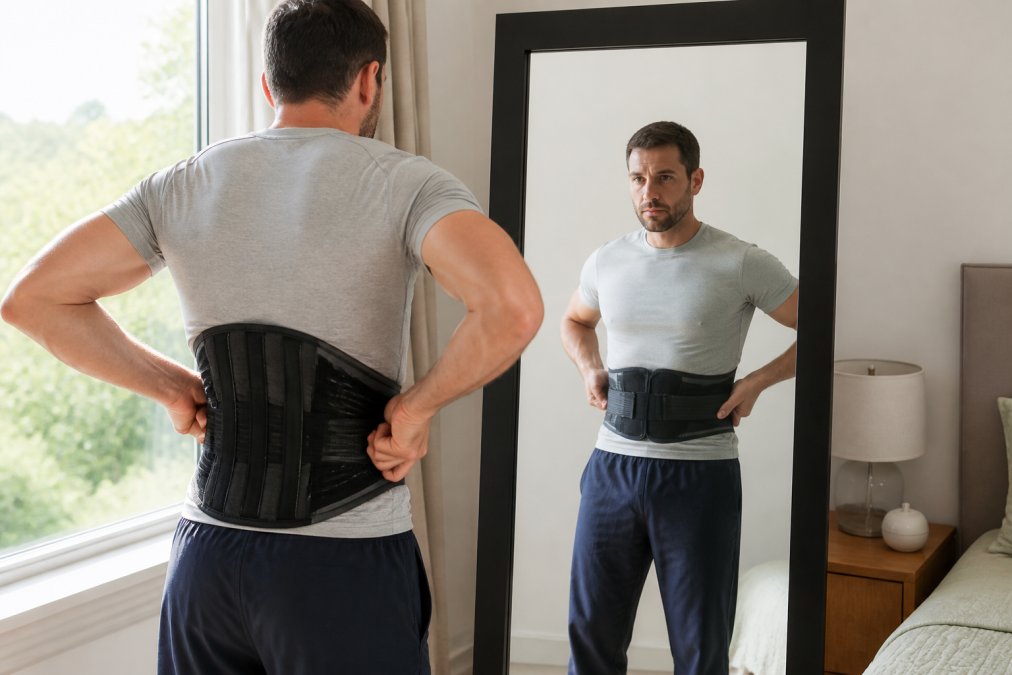
Standing posture and torso alignment
Roll your shoulders back and down, tuck your chin slightly, and let your arms hang naturally. Avoid arching your lower back or slumping forward, a brace fitted while hunched will hold you there once fastened, defeating the purpose of posture correction.
Centering the brace on the lumbar region
The brace's rigid or semi-rigid panel should sit centred over your lumbar spine, with the bottom edge just above the iliac crest (the bony ridge at the top of your pelvis). Too high and it rides into your ribcage; too low and it digs into your hips.
Step 2: Adjust Tightness and Pressure Levels
Tightness is where most people get it wrong. A back brace should feel snug and supportive, not restrictive, enough compression to remind your muscles to hold good posture, without cutting into skin or restricting breathing.
How tight should a back brace be?
A properly fitted back brace allows you to take a full, deep breath without resistance and slide two fingers flat under the edge of the strap. If you can't fit two fingers underneath, it's too tight. If you can fit your whole hand, it's too loose to provide meaningful support.
Step 3: Position the Wings or Side Panels
Side panels, sometimes called wings, do more work than most people realise. These flexible or semi-rigid sections wrap around your waist and provide lateral stability; positioned poorly, the brace loses much of its therapeutic benefit.
Signs a Back Brace Is Too Tight (and What to Do)
Knowing the signs a back brace is too tight matters more than most fitting guides admit. Discomfort isn't the brace "working harder", it's a sign something needs to change.
Watch for these red flags:
- Red marks or indentations that last more than 30 minutes after removal
- Numbness, tingling, or a cold feeling in your legs or feet
- Difficulty taking a full breath or a feeling of pressure on your ribs
- Skin irritation, chafing, or tenderness at the strap edges
- The brace leaving deep grooves in your clothing or skin
How Long to Wear a Back Brace: Ideal Wear Schedule
How long to wear a back brace depends entirely on why you're wearing it, and there's no universal answer. A brace worn for post-surgical recovery follows a very different schedule to one worn for occasional lower back pain during physical work. What most guides skip is the practical rhythm of wear, when to build up, when to back off, and how to check your skin along the way.
General guidance from physiotherapists typically falls into these patterns:
| Purpose | Typical daily wear | Notes |
|---|---|---|
| Post-surgical recovery | As directed by your surgeon | Often continuous during waking hours initially, then stepped down |
| Acute injury support | Short periods during activity | Remove for rest and sleep unless advised otherwise |
| Physical work or lifting | Only during the task | Not for the full working day |
| Chronic pain management | Intermittent, activity-based | Avoid all-day wear to limit muscle dependency |
Building up wear time gradually
A common pattern is to start with one to two hours of wear, then add an hour every few days as your skin and muscles adjust. Jumping straight to all-day wear triggers chafing, sweat rash, and the muscle dependency you're trying to avoid. If you're returning to work, build up over the week before your first full shift.
When to take it off
Take the brace off for sleep unless your surgeon says otherwise, and remove it for showering, any activity where it could get wet or caught, and seated rest where you don't need support. A useful rule: if you're not loading your spine, you probably don't need the brace on.
Skin checks during long wear
Long wear is where skin problems start. Check the skin under the brace every two to three hours for the first week, then at least twice a day. Look for redness that doesn't fade within 30 minutes of removal, tenderness, or broken skin. A thin cotton base layer reduces friction and wicks sweat, and barrier cream on intact skin helps where moisture builds up.
Weaning off
As your recovery progresses, your physiotherapist will usually reduce wear time rather than stopping abruptly. A typical step-down is to drop one hour of wear per day each week while increasing activity without the brace. The goal is to keep your core muscles doing their share of the work, so the brace supports recovery rather than replacing muscle function.
Wearing a Back Brace Over or Under Clothing
Wearing a back brace over or under clothing changes both comfort and how well it works. Most braces perform best over a thin, snug base layer: a fitted cotton undershirt prevents straps rubbing directly against skin, absorbs sweat, and helps maintain skin integrity during long wear.
Troubleshooting Common Discomforts and Fitting Differences by Brace Type
Not all braces fit the same way, and discomfort usually traces back to a specific mismatch between the brace design and your body or activity. Use the checklist below to diagnose the problem, then match the fix to your brace type.
Visual red-flag checklist
Run through this after every fit adjustment:
- Brace too high: top edge presses into the ribcage, you feel pressure when you breathe deeply, or the brace rides up when you raise your arms.
- Brace too low: bottom edge digs into the iliac crest, you feel pinching when you sit, or the brace slides down when you walk.
- Brace off-centre: one side has more material than the other, the panel sits to one side of your spine, or the brace twists as you move.
- Too tight: two fingers won't slide under the strap edge, you can't take a full breath, or you feel numbness, tingling, or a cold sensation in your legs or feet.
- Too loose: the brace shifts when you bend or twist, you can fit your whole hand under the strap, or it needs constant tugging back into place.
- Nerve impingement signs: persistent tingling, numbness, or weakness in the legs or feet, remove the brace and speak with your physiotherapist before wearing it again.
Sitting versus standing adjustment
A brace fitted while standing may feel loose once you sit, because your torso compresses slightly and your hip position changes. If you spend most of the day seated, fit the brace in a chair first, then check it again when you stand. When transitioning from sitting to standing, re-centre the panel over your lumbar spine and check the two-finger rule before moving.
Fitting differences by brace type
- Lumbar belts: Simplest to fit. Centre the panel over the lumbar spine, fasten the velcro evenly, check the two-finger rule, then test with a gentle bend and twist.
- Thoracolumbar orthoses: Add shoulder straps. Fit the lower section first, then adjust the upper straps so they sit flat without pulling. Check that the upper section reaches around your mid-back without restricting shoulder movement.
- Rigid shell braces: Custom-moulded and typically fitted clinically. Padding placement matters more than strap tension, so follow your orthotist's instructions exactly and report any pressure points at your next review.
- Postural support braces: Designed to pull shoulders back. Fit them snug but never tight enough to restrict breathing, and check that the shoulder straps aren't twisted or digging into the underarm.
Skin care under the brace
If you're sourcing a brace and want guidance on which type suits your situation, REHABESHOP stocks a curated range of physiotherapist-trusted supports, and our team can point you toward the right category before you order. Every product ships Australia-wide, and unused items are covered by a 14-day return policy if the fit isn't right.
Frequently Asked Questions
How should my back brace fit?
A back brace should fit snugly without causing pain or restricting breathing. The main panel should sit centred over your lumbar spine, with the bottom edge resting just above your hip bones. You should be able to slide one finger under the straps. If you feel pinching, numbness, or tingling, loosen the straps slightly. A proper back brace fit supports your spine without digging into your skin or shifting when you move.
How many hours a day should you wear your back brace?
Wear time depends on your condition and your doctor's advice. Many people wear a brace for 2 to 4 hours at a time during activities that strain the back, then remove it for rest. Some recovery plans involve wearing it for most of the day. Always follow the schedule your physiotherapist or doctor gives you. Wearing it longer than recommended can weaken your core muscles over time.
What are the signs that my back brace is too tight?
Signs a back brace is too tight include difficulty taking deep breaths, numbness or tingling in your legs, red indentations that last more than 30 minutes after removal, and pain that gets worse instead of better. If you notice any of these, loosen the straps or remove the brace and check with your healthcare provider. A brace should feel supportive, not constricting.
Are you supposed to wear a back brace over or under clothes?
Most back braces are designed to be worn over a thin layer of clothing, such as a fitted t-shirt or singlet. This protects your skin from friction and keeps the brace clean. Wearing it directly against the skin can cause irritation, especially during exercise. Avoid thick or loose clothing underneath, as it can cause the brace to slip and reduce the support it provides.
Getting the fit right is the difference between a brace that supports your recovery and one that creates new problems. If you're unsure which design suits your needs, REHABESHOP offers professional-grade braces and orthotics selected with physiotherapist input, fast delivery across the country, and a straightforward 14-day return policy on unused items. Browse the range at REHABESHOP and get the support that actually fits.
0 comments